3D Viewer
The 3D Viewer is Zipoly's built-in Three.js-based model preview tool: drag in a GLB/FBX/OBJ/STL model to inspect it in real time, with section clipping, animation preview and 24-hour lighting simulation, plus screenshot export (PNG) and video recording (WebM). Free forever — no license required. Main use cases: verifying compression results, inspecting internal model structure, previewing animations, and creating model showcase assets.
Loading Models
Drag & drop files onto the viewer area — multiple models can be loaded at once.
Supported formats: GLB, glTF, OBJ, FBX, STL, DAE, PLY
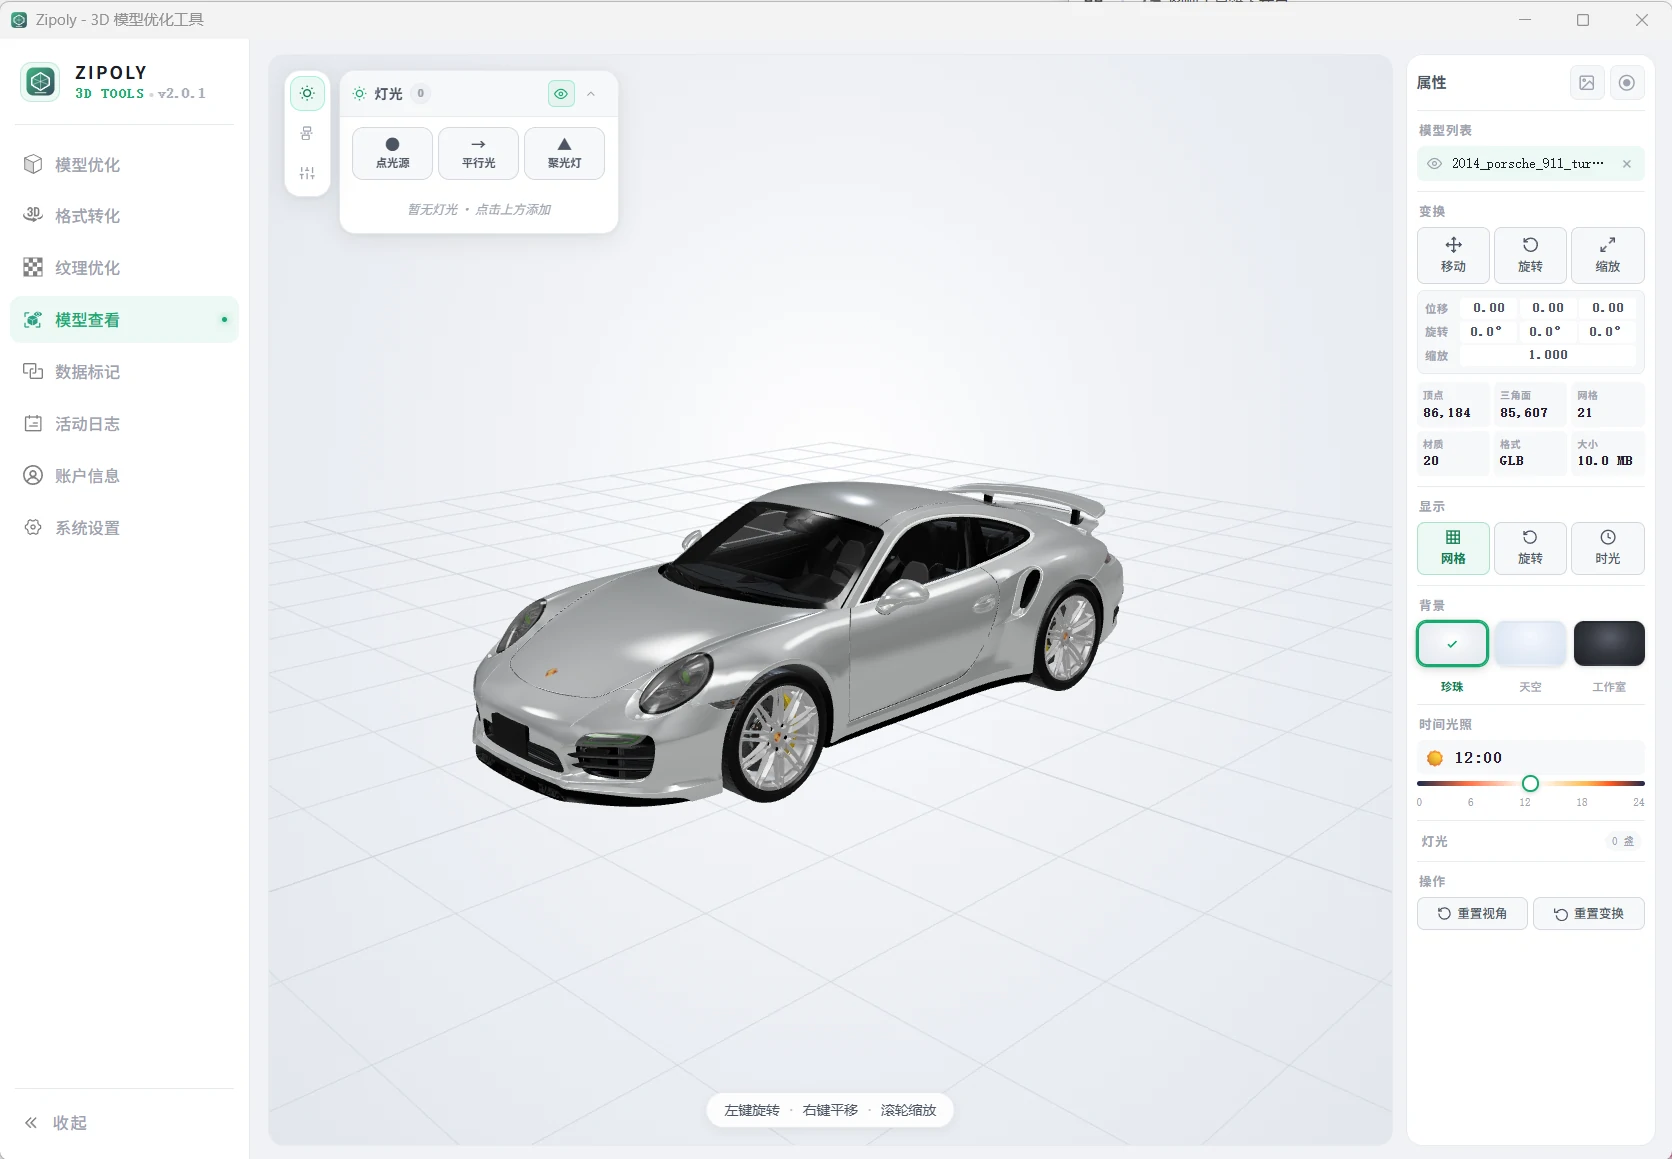
Compare compression results: drag in the original model, then drag in the compressed one, and toggle visibility from the right panel to compare.
Controls
| Action | Method |
|---|---|
| Orbit | Left-click drag |
| Pan | Right-click drag |
| Zoom | Scroll wheel |
| Frame view | Button in the right panel |
| Gizmo transform | Pick Move / Rotate / Scale in the right panel, then drag |
Left Toolbar
A vertical toolbar sits at the top-left of the canvas. Click an icon to expand its panel; click again to collapse:
| Tool | Function |
|---|---|
| Lights | Add / remove point lights, directional lights and spotlights; drag to reposition the light and its target |
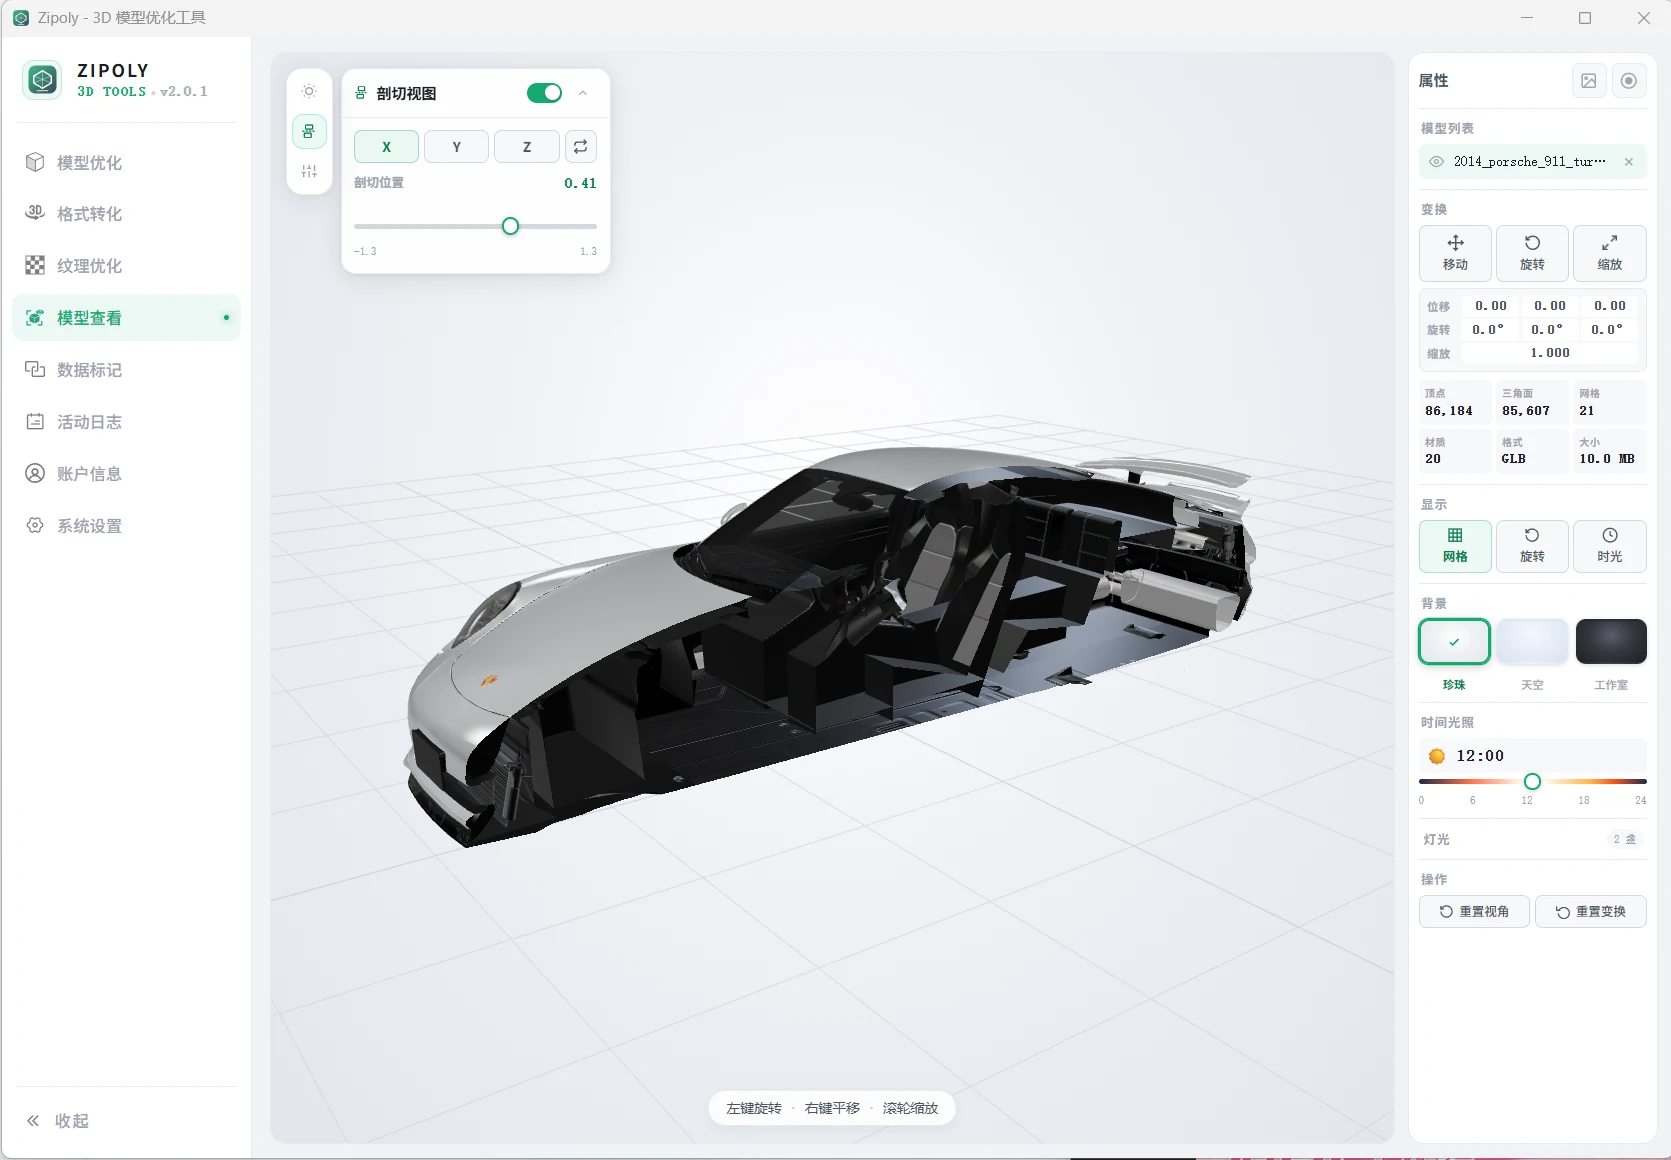
| Section | Cut the model along the X / Y / Z axis to inspect internal structure |
| Environment | Configure the floor grid and default light intensity |
Section Clipping
Open the "Section" panel in the toolbar and pick a clipping axis (X / Y / Z):
- Drag the position slider to move the clipping plane along the axis (cuts from the positive direction by default)
- The Invert button switches which side is kept
- Helper objects such as light guides and gizmos are clipped away with the model; cut-away parts cannot be selected
Great for inspecting internal assemblies, floor plans and similar scenarios.
Animation Preview
When the model contains animation clips (e.g., embedded in GLB), the "Animation" panel in the right sidebar becomes available:
- Pick a clip from the list (multi-clip models supported)
- Play / pause / stop
- 0.1x – 3x playback speed
Lighting & Background
Default lighting: built-in IBL environment light (precomputed from RoomEnvironment). Dark and metallic PBR materials stay readable without extra lights, at negligible performance cost.
Background presets: Pearl White (product showcase) / Sky Blue (outdoor architecture) / Studio (professional studio look).
Time-of-day lighting: drag the time slider to simulate a 24-hour sunrise/sunset cycle. Enable the 时光 (auto-time) toggle and record a video to capture the lighting as it changes.
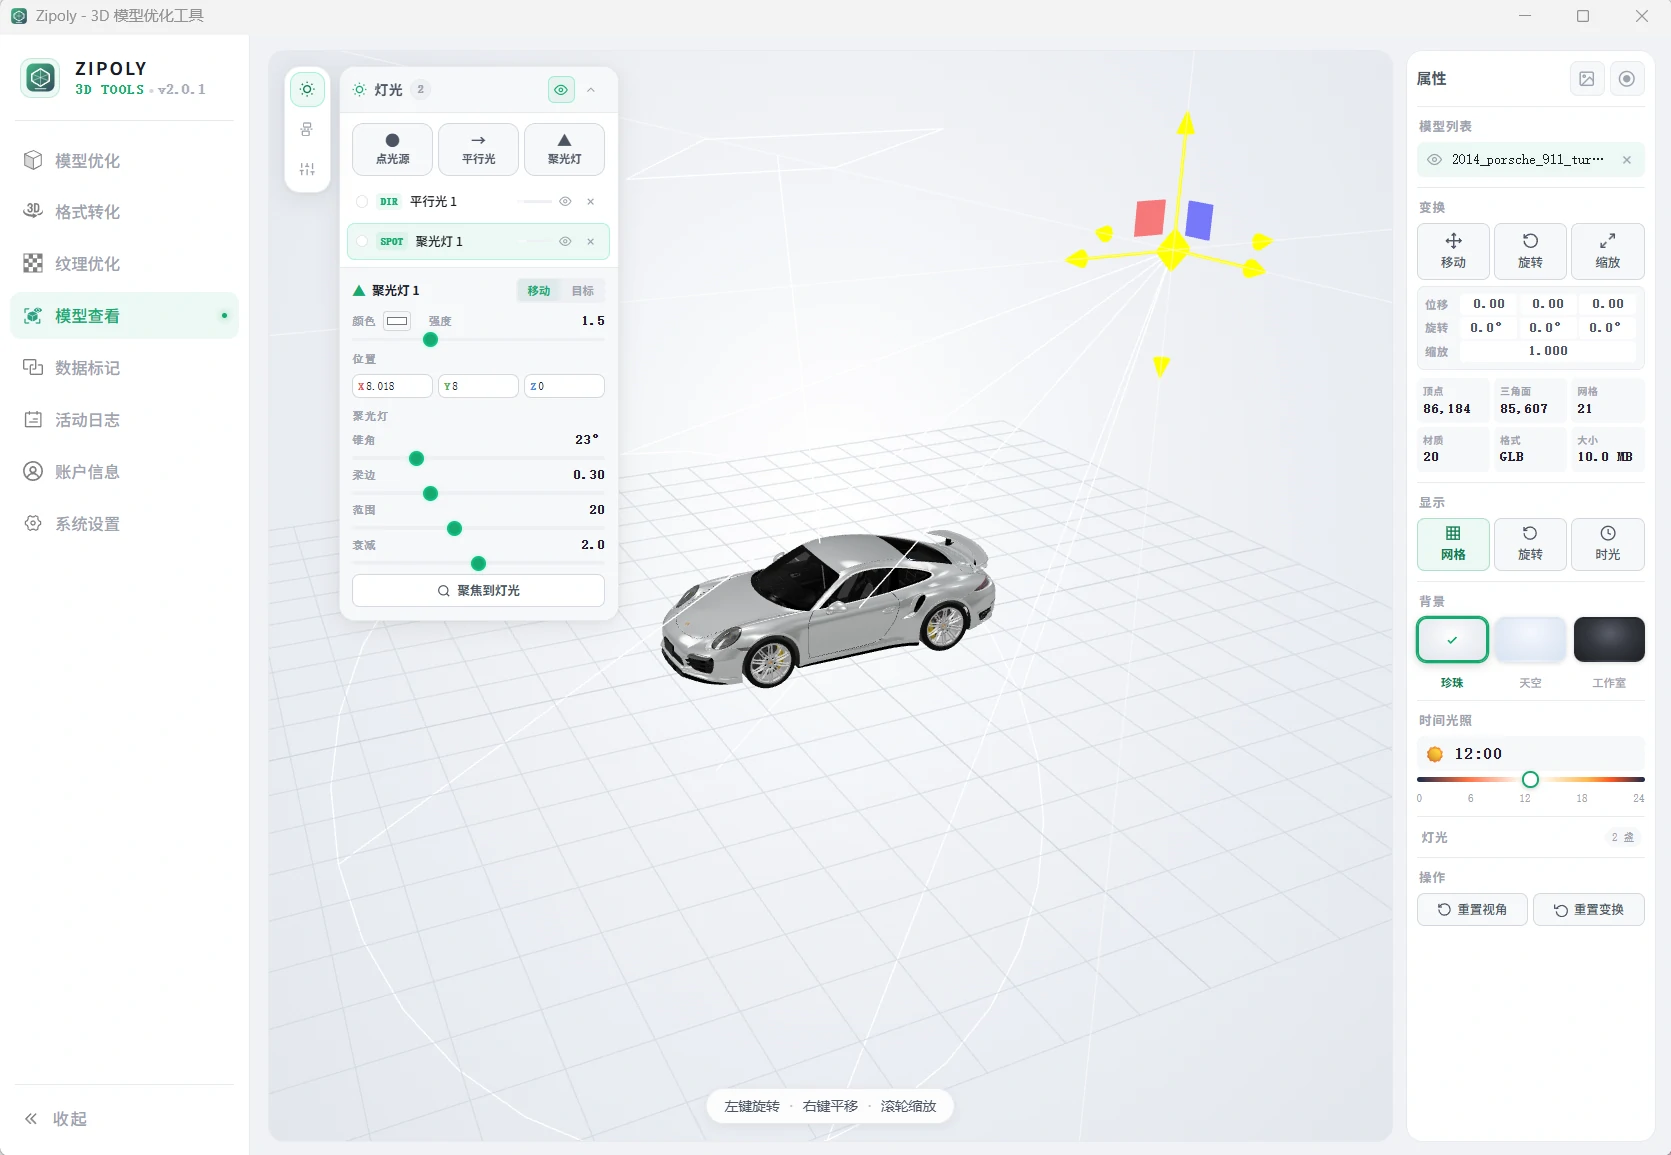
Custom lights: use the "Lights" panel in the toolbar to add point / directional / spotlight lights and adjust color and intensity; the "Move / Target" buttons choose whether you drag the light itself or its target point.
Environment panel: the "Environment" panel in the toolbar lets you adjust:
- Floor: texture mode (none / grid / custom image), size (0.5–200), segments (2–120), opacity
- Default lights: ambient (IBL) intensity (0–2)
The grid visibility toggle lives in the "Display" section of the sidebar.
Screenshots & Recording
- Screenshot: click the camera icon to save the current view as PNG
- Recording: click the record button to start (a REC badge appears top-right), click again to stop, saved as WebM (30fps)
Convert WebM to MP4: ffmpeg -i recording.webm -c:v libx264 output.mp4
Typical Use Cases
- Compression QA: drag in both versions, compare from the same angle, verify no artifacts or broken faces
- Internal inspection: section through assemblies or building floors, screenshot and annotate issues
- Animation checks: preview embedded GLB animation clips with speed control
- Showcase production: time-of-day lighting + recording for product videos, or multi-angle stills
FAQ
Is the 3D Viewer paid?
No. The viewer, screenshot export and video recording are free forever — identical in the free and licensed tiers.
Which formats does the viewer support?
GLB, glTF, OBJ, FBX, STL, DAE and PLY — drag files straight in, no conversion needed.
How do I compare before/after compression?
Drag both the original and the compressed model into the viewer and toggle their visibility from the list on the right, comparing from the same camera angle.
What format are the recordings?
WebM (VP9, 30fps). Convert to MP4 with ffmpeg: ffmpeg -i recording.webm -c:v libx264 output.mp4.
Can the viewer edit models?
No. The viewer is a read-only preview tool (camera, sectioning, lighting, recording) — it never modifies geometry or materials. Edit models in Blender or your DCC software first, then compress them in Zipoly.